See what's happening
with your car
An open project exploring DIY dashcam builds for cars with remote access.
What we dream about
A dashcam in your car is an everyday thing. But we believe they should be better.
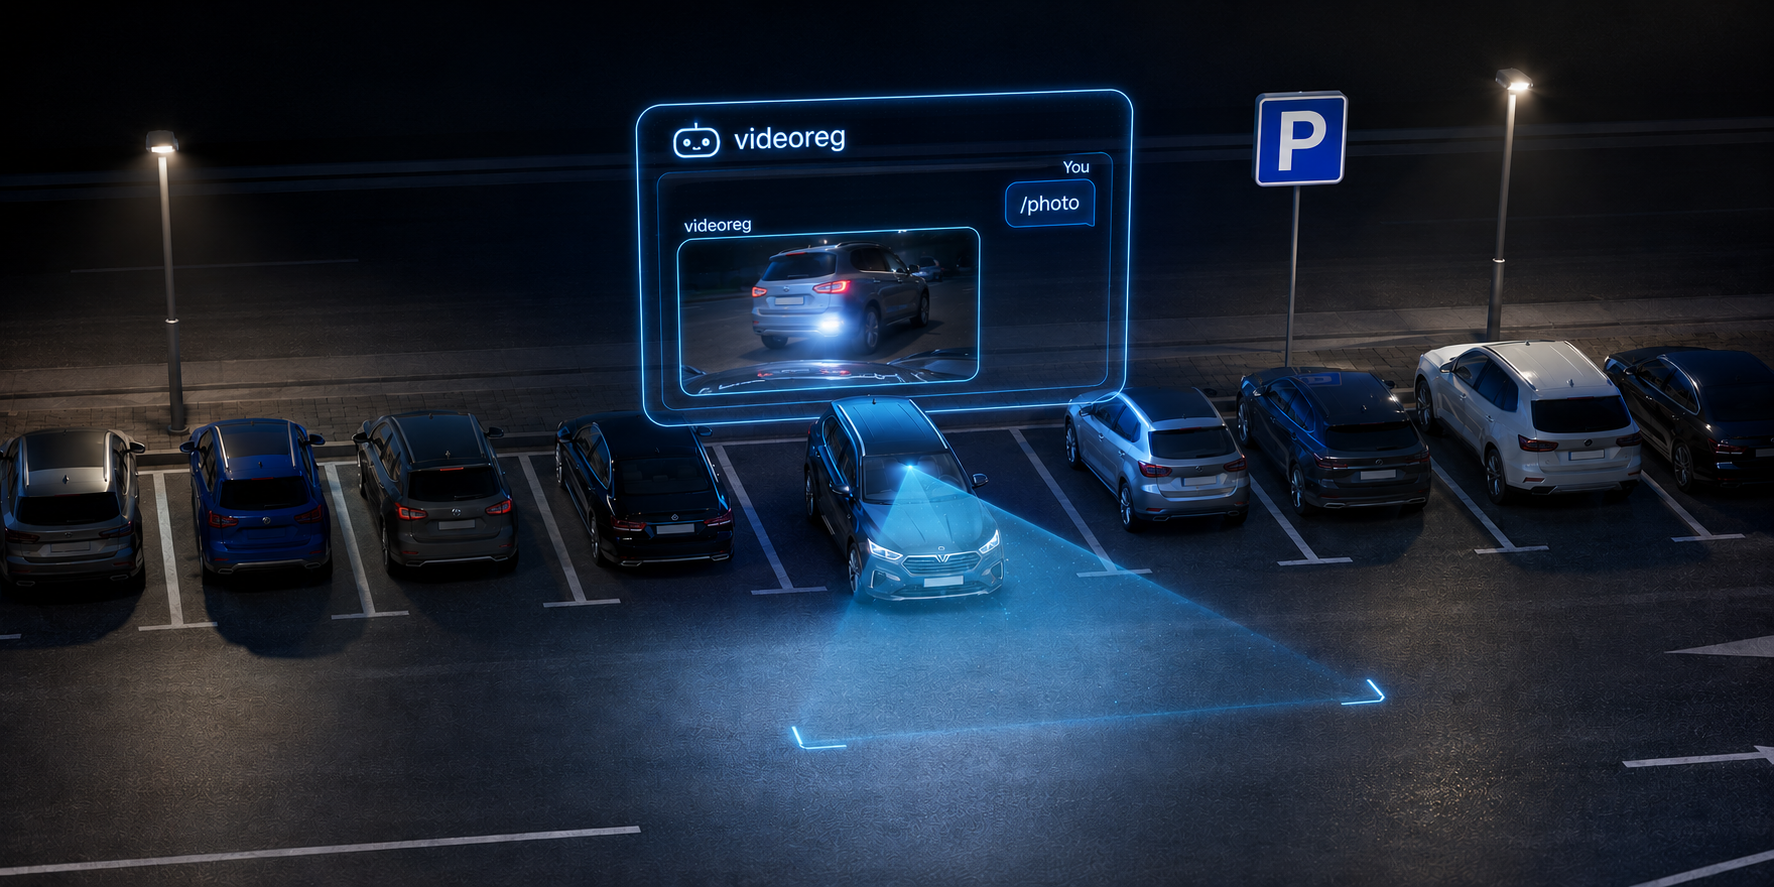
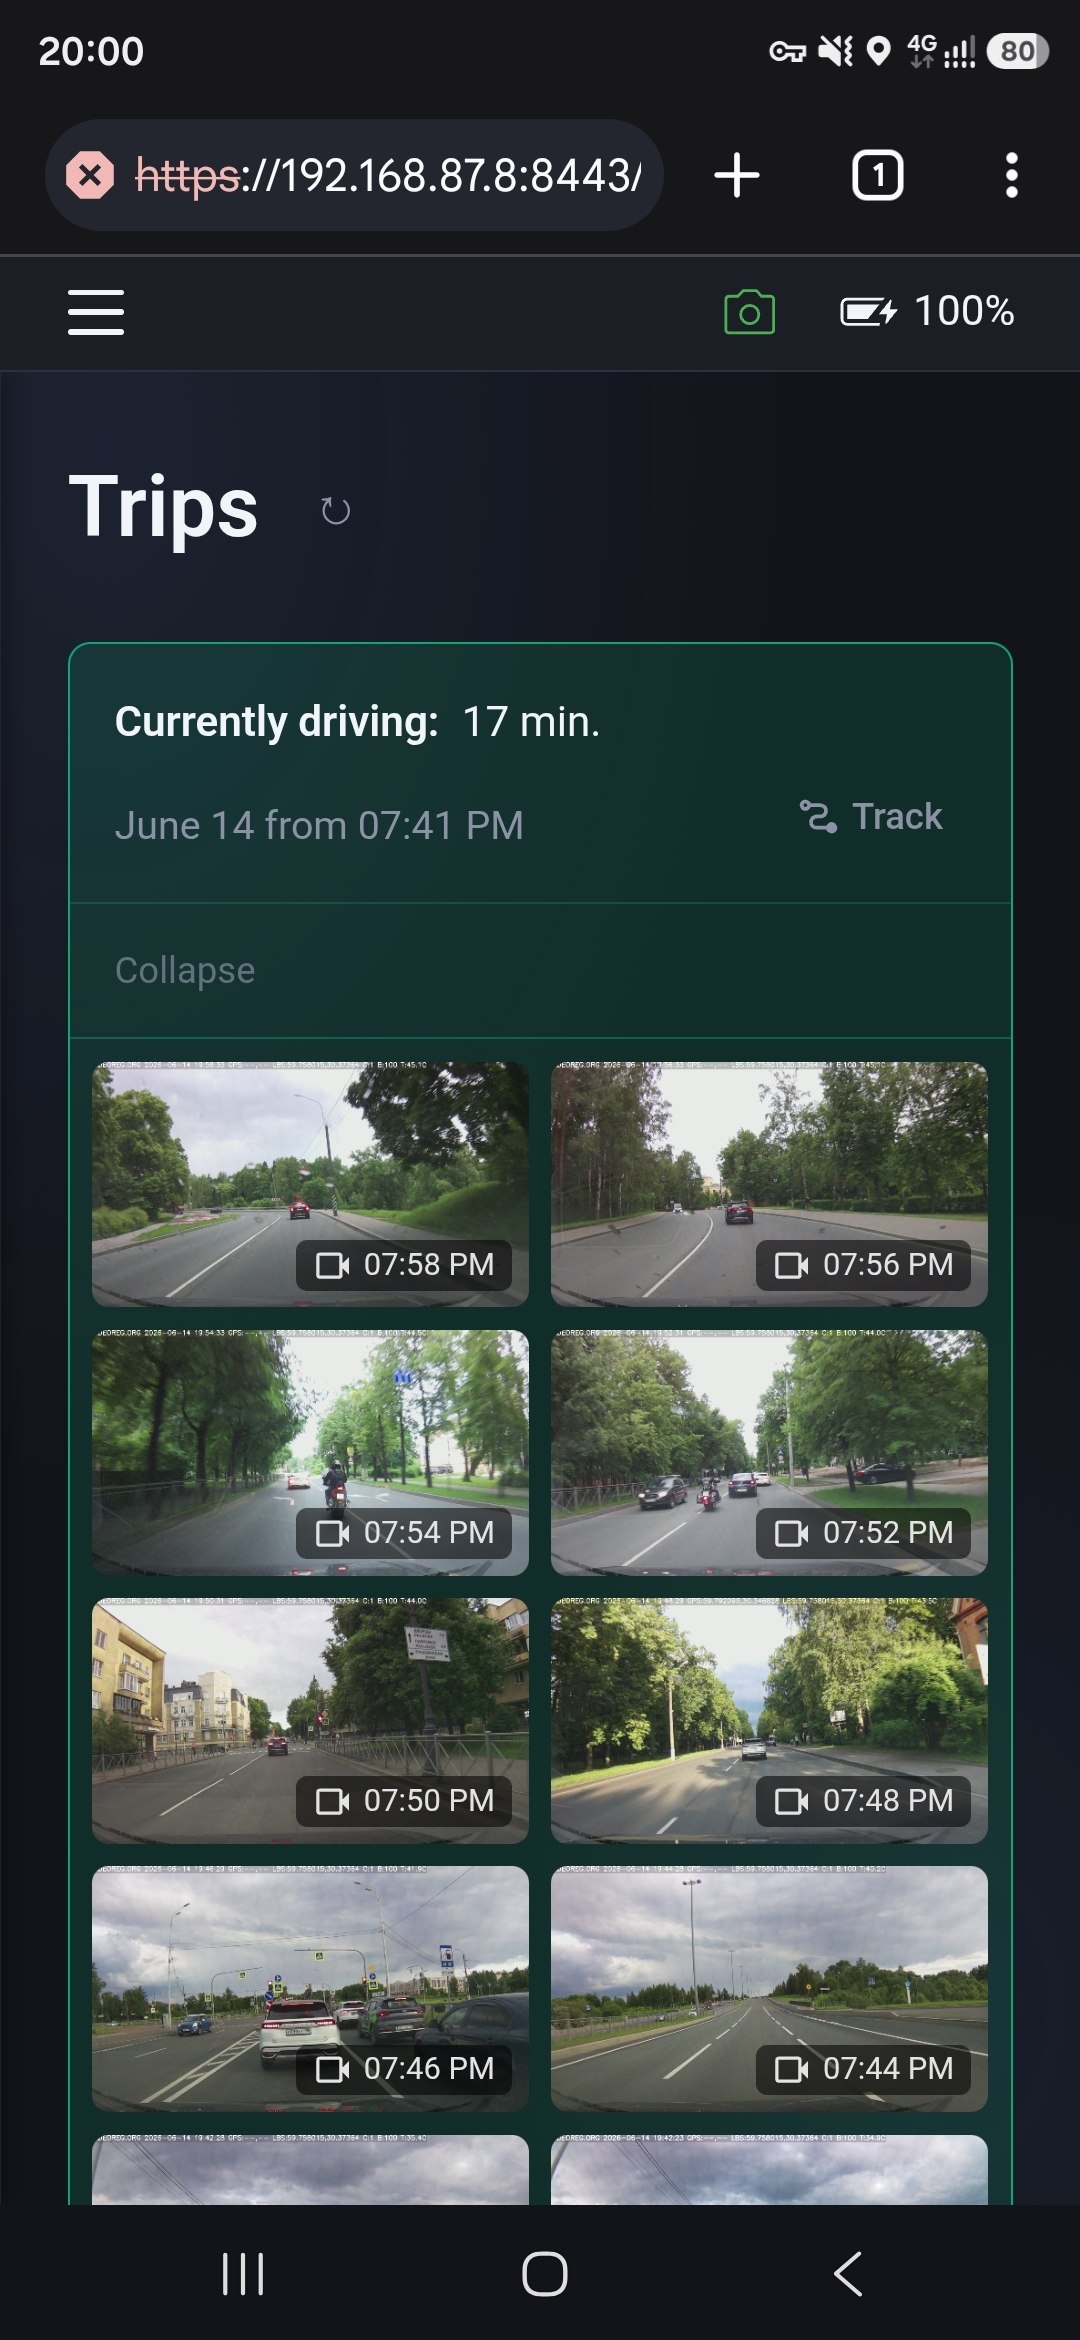
Convenient remote access
Browse your footage via chat from the comfort of your couch — not just by connecting to the dashcam's WiFi while sitting in the car.
Auto-sync to your home NAS
Automatic video sync without third-party services. Your personal data belongs only to you.
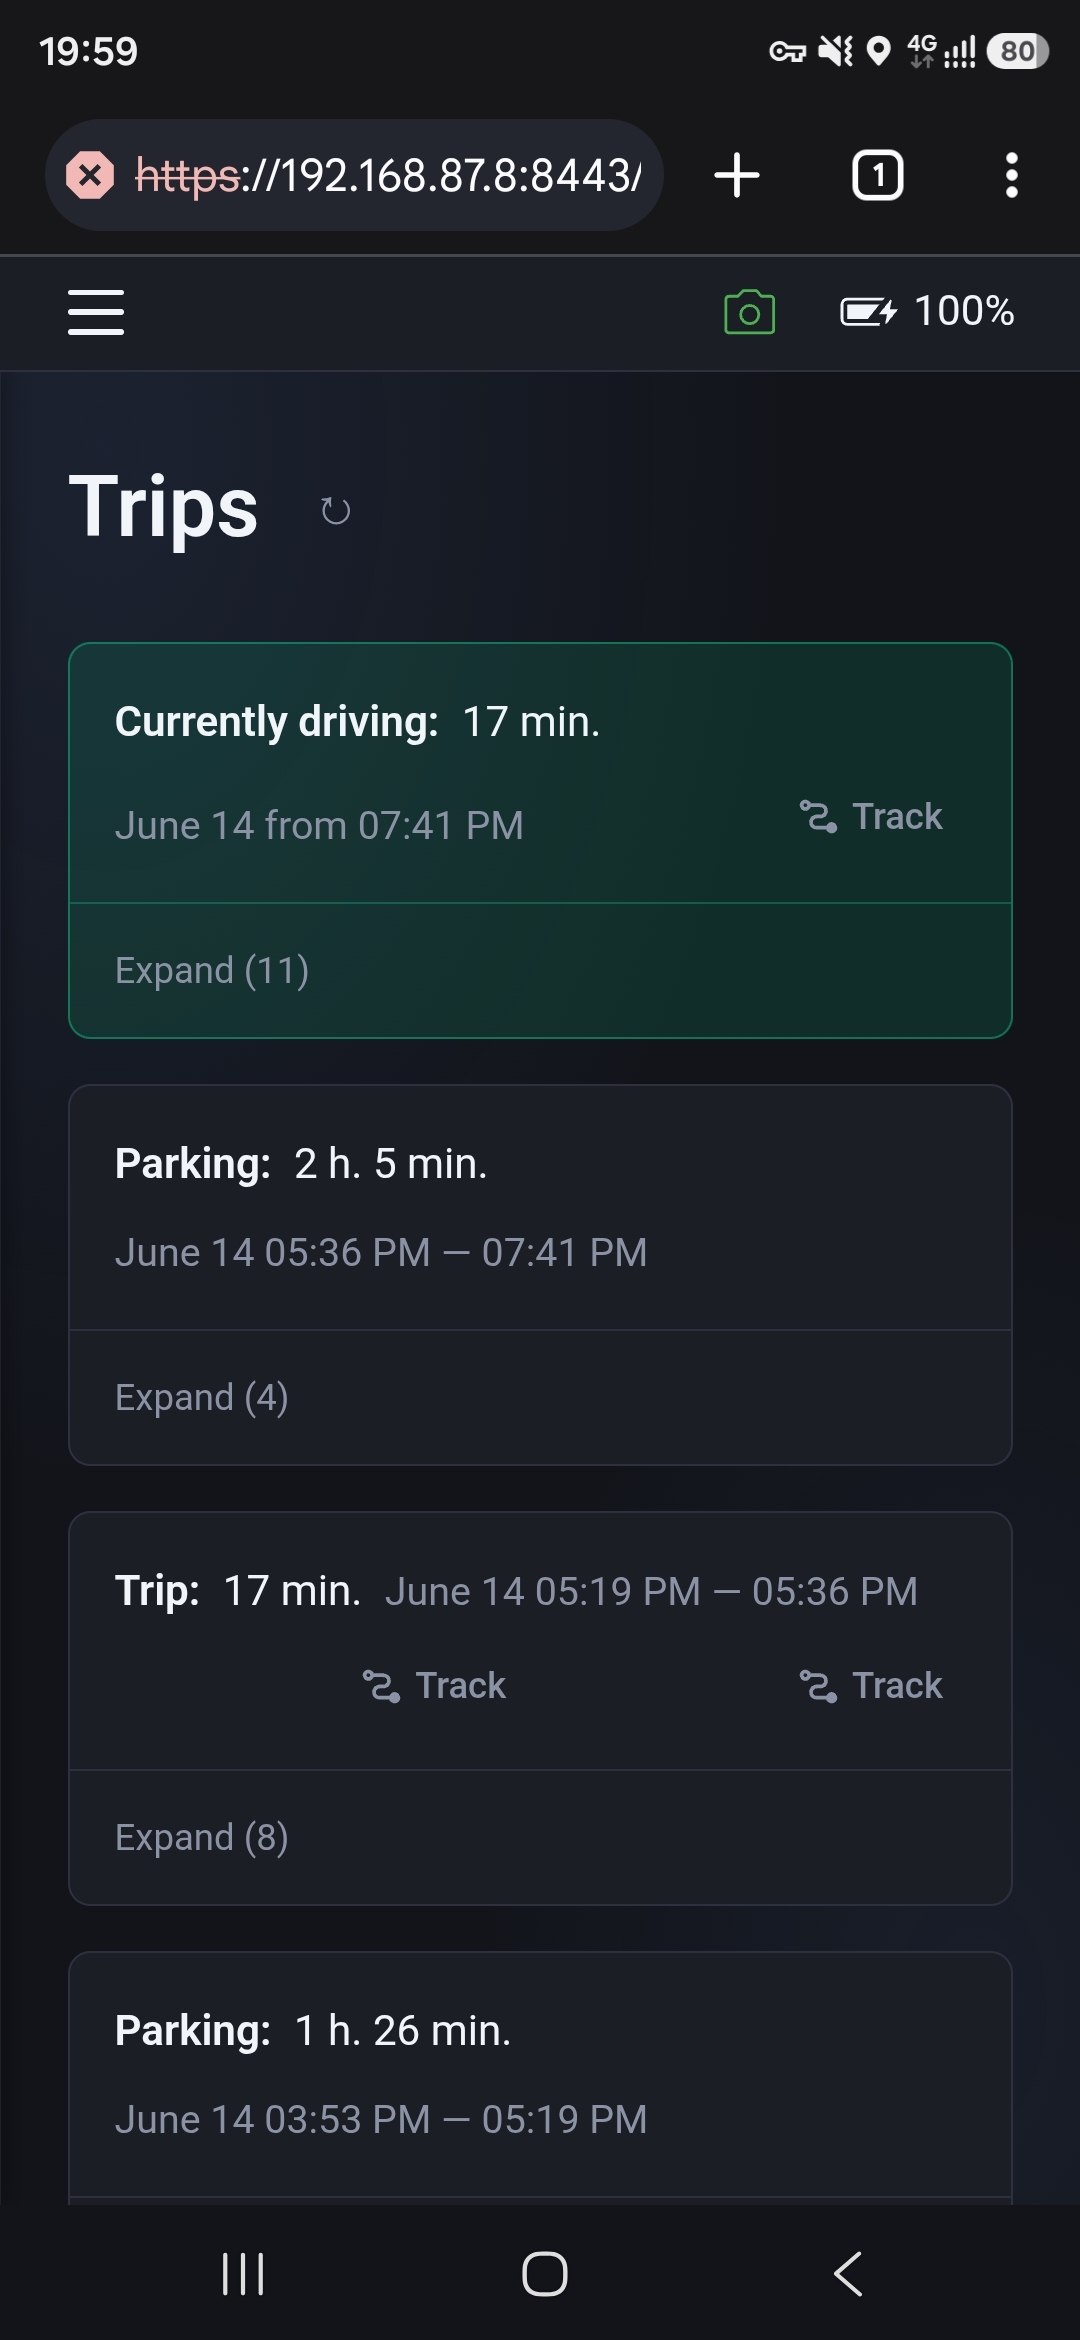
Remote monitoring
Check why your car alarm went off — was it a passing motorcycle or did someone bump into your car?
Open platform
To evolve the product. To learn. To create.
Raspberry Pi-based implementation
Core dashcam
- Continuous video recording to SD card
- OSD overlay: time, GPS coordinates
- Loop recording with configurable clip length
Parking mode
- Regular photos for incident monitoring
- PiSugar 3 UPS keeps it alive when car is off
- Low power consumption standby
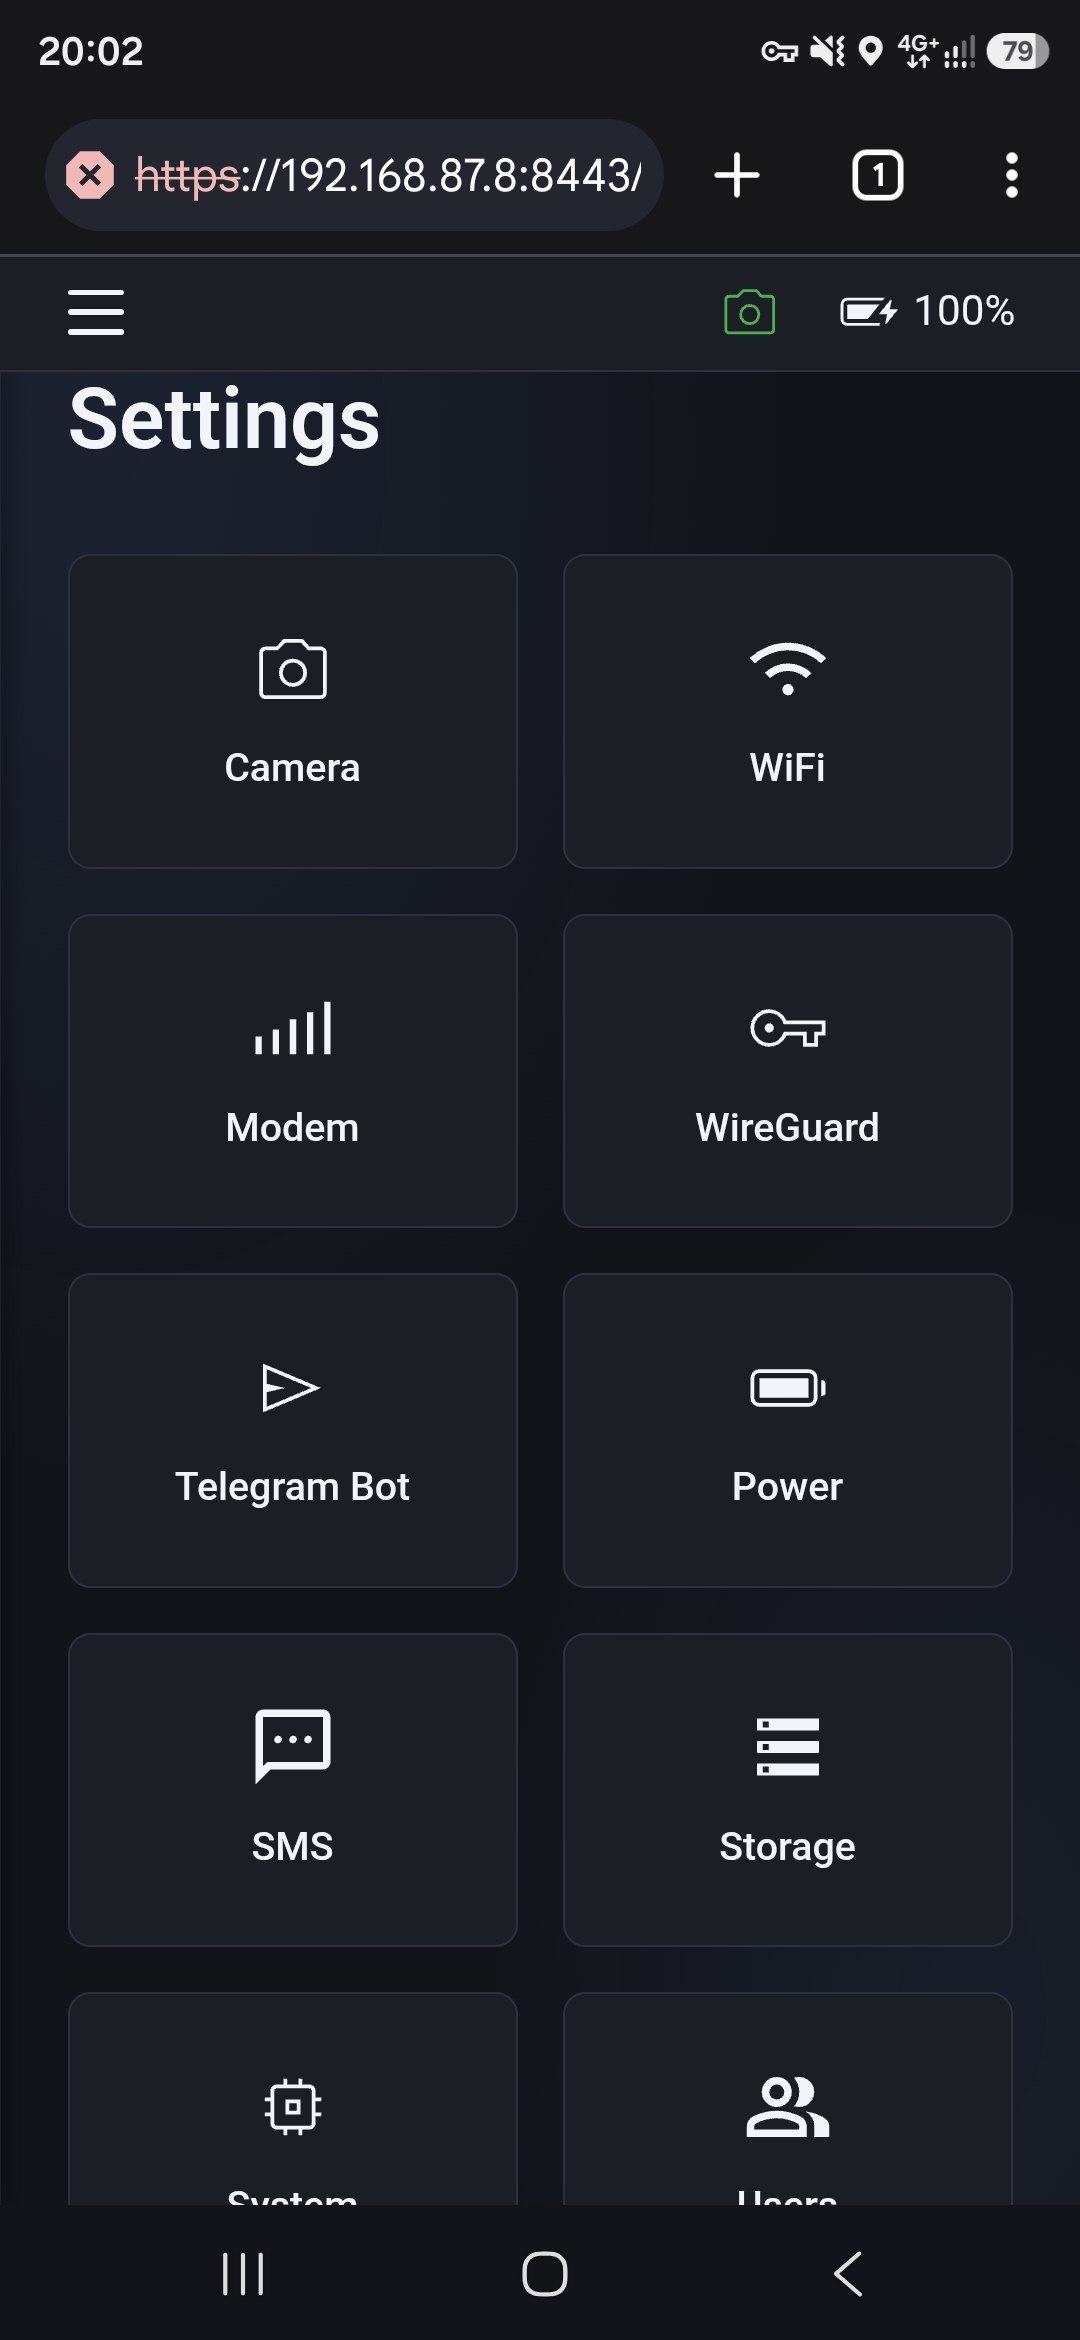
Remote access
- Telegram bot control
- Web UI
- Download videos and photos remotely
- 4G connectivity via USB modem
Multi-user access
- Share access to Web UI and Telegram with other people
Preview
Screenshots

Video
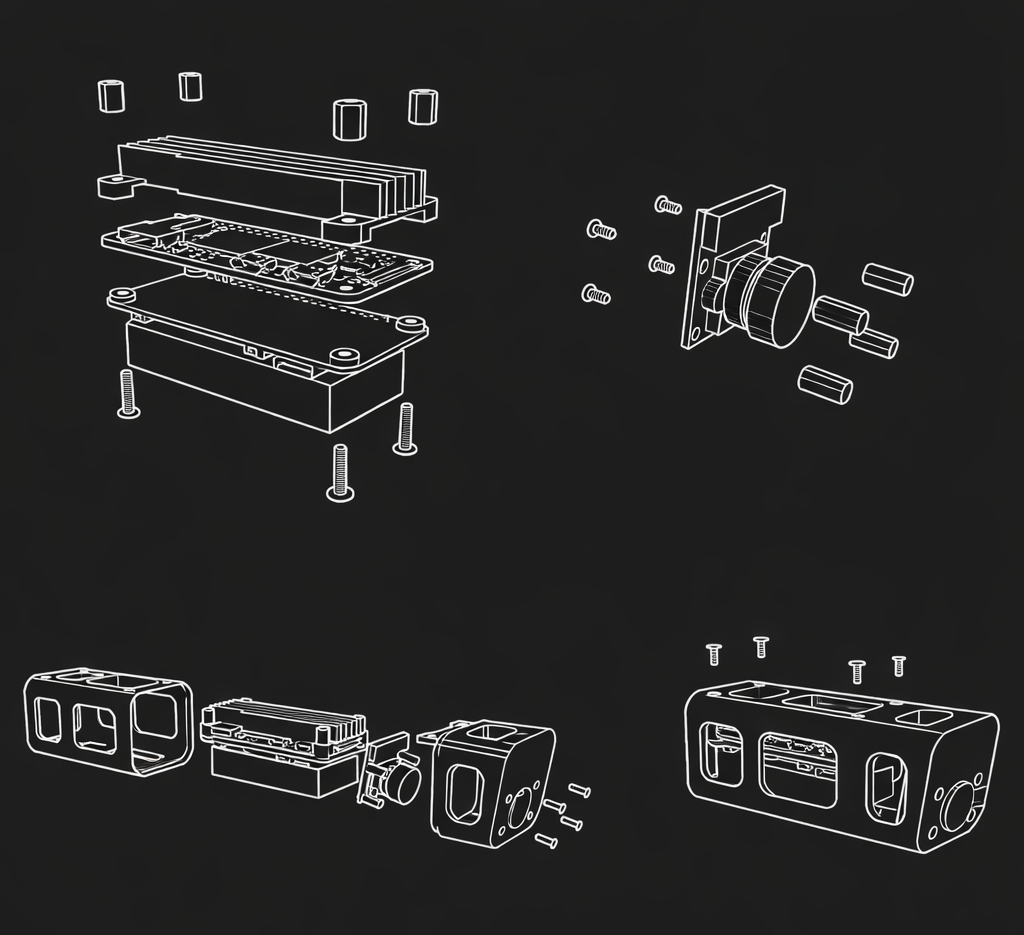
Hardware
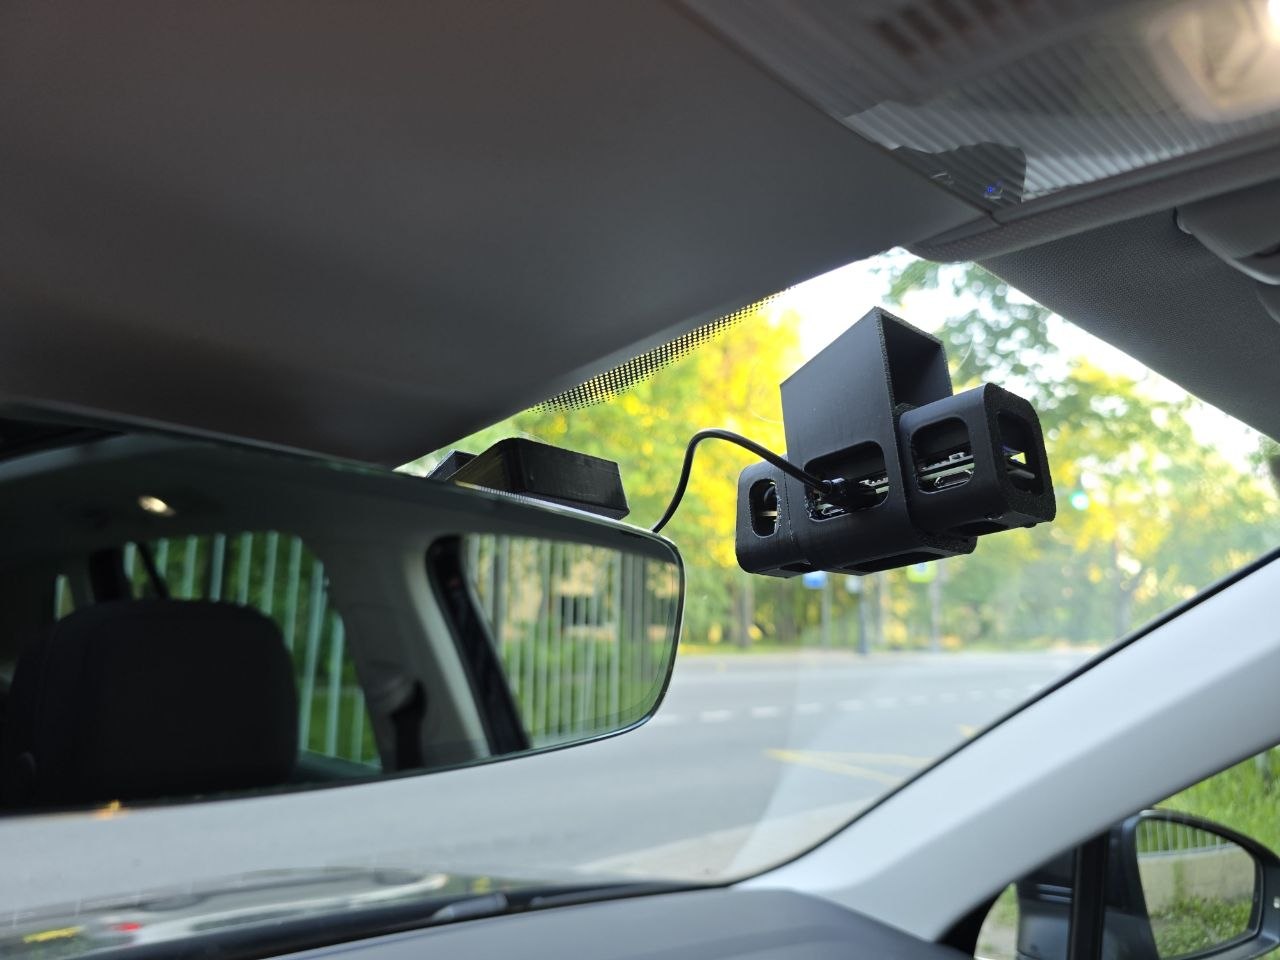
Raspberry Pi Zero 2W
Main compute board with heatsink.
PiSugar 3 UPS
UPS — keeps device alive when car is off. Different types of UPS described in README.
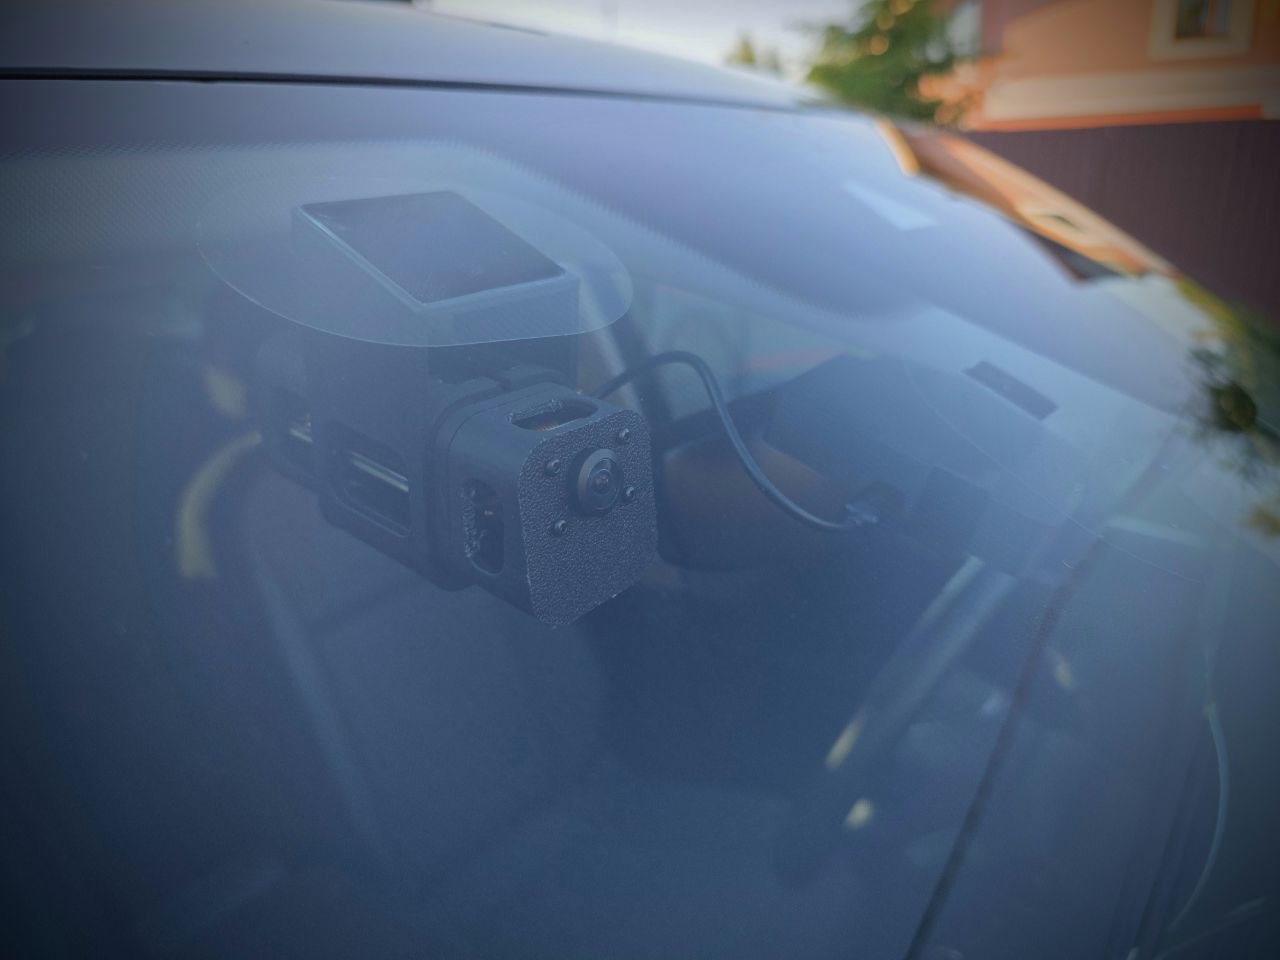
Camera module
Any RPi Zero 2W–compatible CSI camera. OV5640 and Pi Camera Module 3 are tested.
4G Modem
With GPS antenna (recommended). SIM7600 and A7670 are tested.
Flash firmware and first boot
Download the image
Grab the latest .img release from github.com/videoreg/pi-gen/releases
Flash to SD card
Use Raspberry Pi Imager to write the .img file to your SD card.
Connect to WiFi
Power on the device. Connect to the WiFi network videoreg, password 12345678.
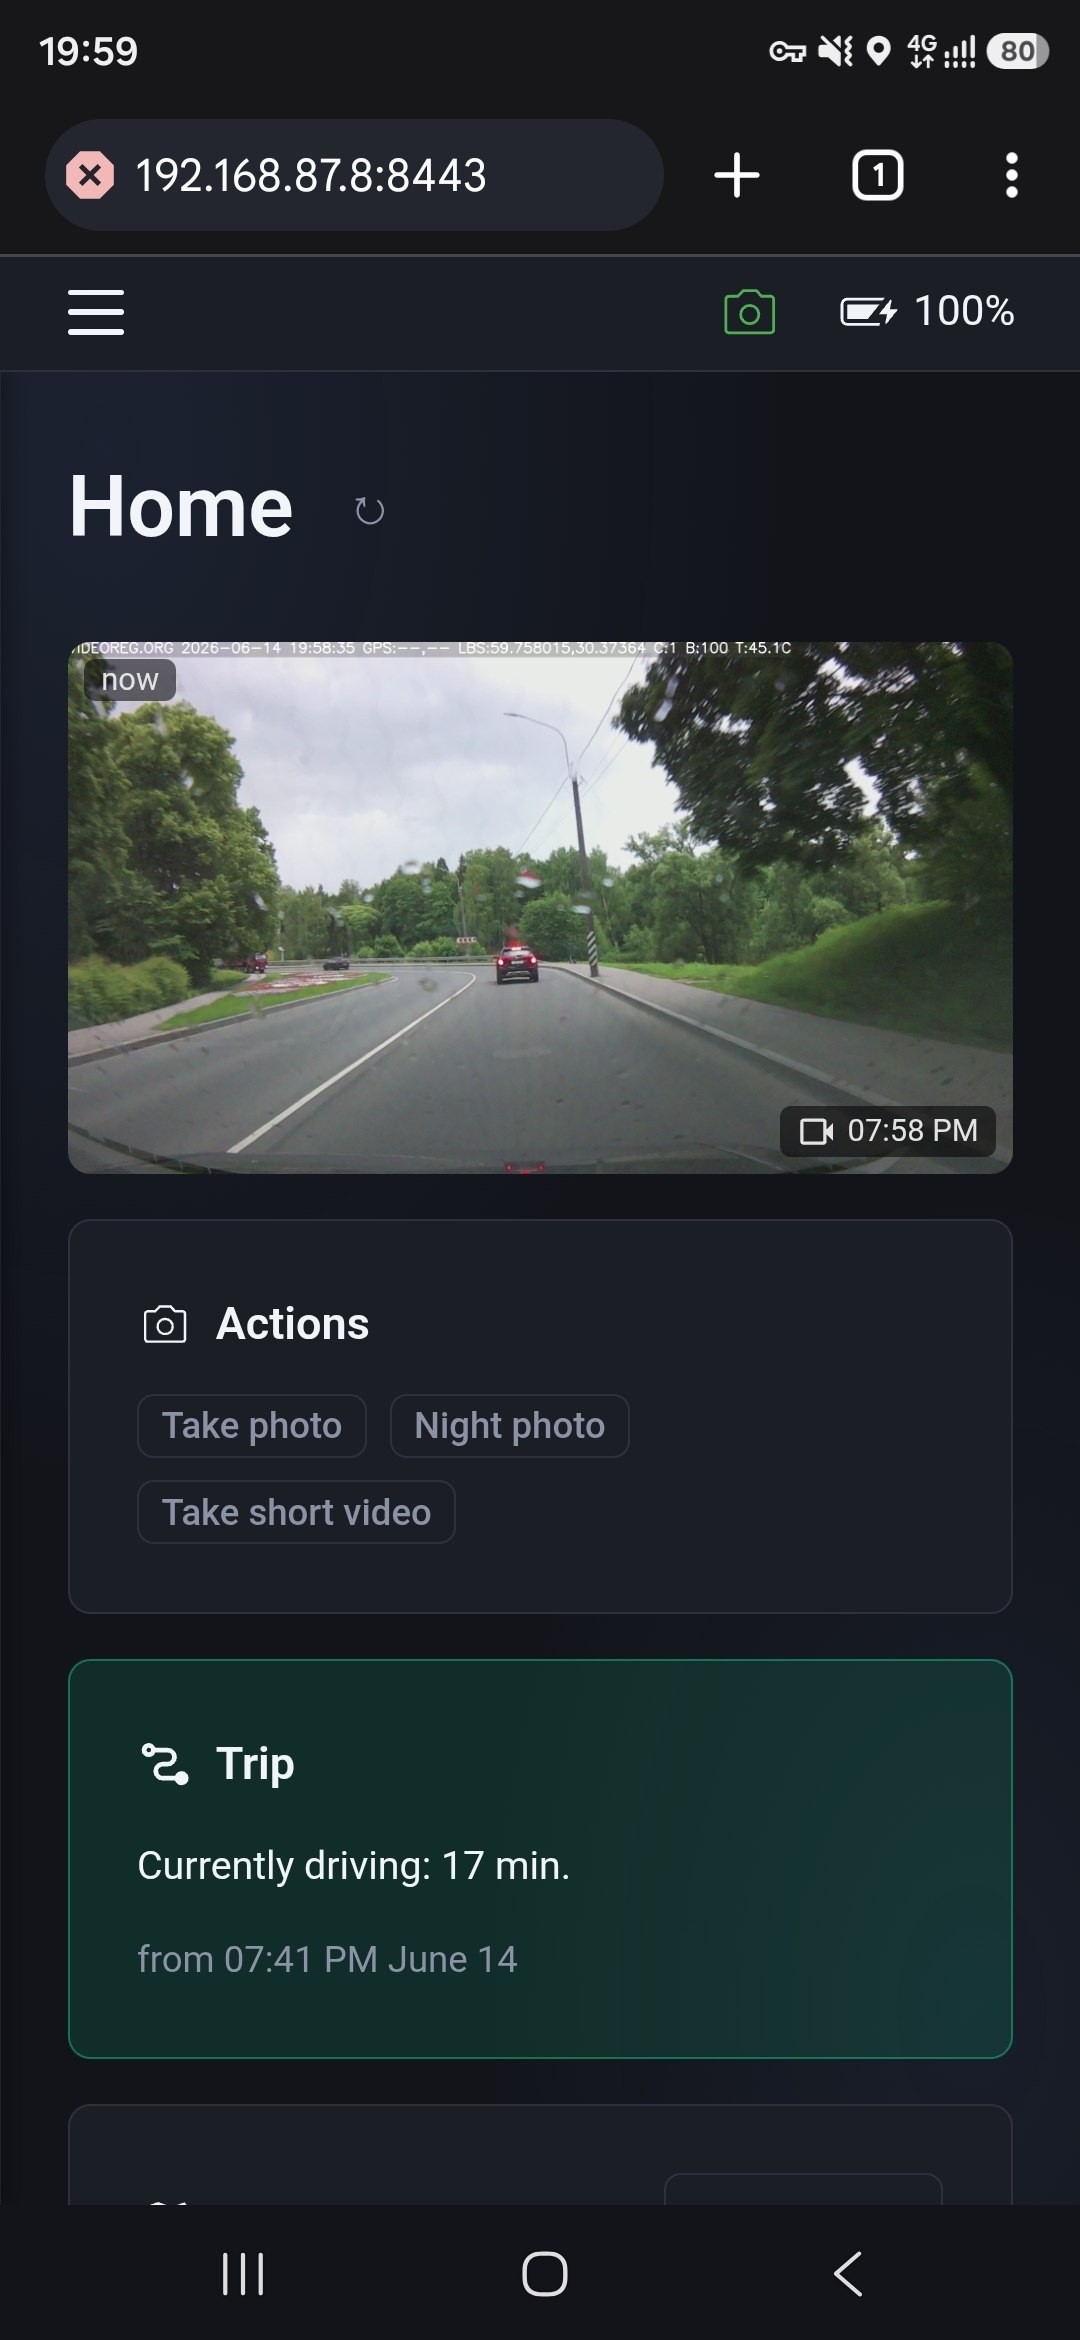
Open Web UI
Navigate to http://10.0.0.1:8443 — login admin, password videoreg.
Follow recommendations
See the README at github.com/videoreg/pi-videoreg for tuning and best practices.